A home espresso setup is not a machine. It is a chain of steps, and the weakest link sets the ceiling on every shot you pull. Most people start by shopping machines, spend the entire budget there, and bolt on a grinder with whatever is left over. Then they wonder why Monday's shot tastes sour, Friday's tastes bitter, and the same beans never taste the same twice.
I have pulled more than 40,000 shots in twelve years behind a bar, managed a third wave coffee bar, and now build home espresso setups for friends, family, and two cafes. This is the version of that conversation I have most often: what to buy first, what to skip, and the actual steps that turn a home espresso setup into something repeatable instead of something lucky.
Why you should trust me
Twelve years as a barista, then a third wave bar manager, then a consultant who gets called when someone's new machine is pulling gushers and they cannot figure out why. I have a machine graveyard in my garage: the Breville that leaked, the Gaggia I modded until it was unrecognizable, and an ECM that is still going and will probably outlive me.
I do not review a machine until I have pulled at least 30 shots on it. I do not make crema claims without tasting the shot, because crema is decoration and taste is the test. And I will not recommend a machine without telling you what grinder to put next to it, because that is the part almost everyone gets backwards.
How I picked and how I tested
My current focus is a month of daily shots on 2026 home espresso machines, same beans, same grinder, same question at the end of every session: does this make you want another cup? That test has killed more machines than any spec sheet ever did.
The two pieces below are the starting pair I would hand a friend with a normal kitchen and a normal budget. I judged them on four things. What the grinder actually does at espresso fineness. Whether the machine holds brew temperature steady across a shot, because temperature stability is the difference between consistent espresso and sometimes great, sometimes sour. How long the dead time runs between brew and steam. And whether the workflow is one you would still enjoy in month three, not just on a Sunday morning when you have nowhere to be.
My bias is not a secret. The grinder is 70 percent of the shot. A $500 machine with a $300 grinder beats a $2,000 machine with a $50 grinder, and I will say that in every guide I write until it stops being true.
The two pieces your home espresso setup needs
You can build a station around almost any machine if the grinder is right. You cannot rescue a good machine with a bad grinder, no matter how careful your tamp is. So here is the pair I start people on, in the order I would buy them.
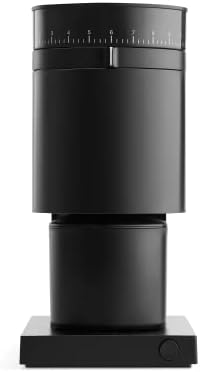
Buy this first: Fellow Opus Conical Burr Coffee Grinder, 41 Settings, Anti-Static, Black
 Visit on Amazon →
This is the piece I would put on the counter before I put a machine there. Conical burrs, 41 settings, and a range wide enough to walk from espresso fineness out to drip and press, which matters more than people expect: you will want a second brew method, and a grinder that only does espresso locks you into one drink forever.
The anti-static part of the spec is the one I care about most in a kitchen. Static is why a grinder sprays fines across your counter and why retention builds up inside the chute. Anything that tames it keeps your dose honest, and an honest dose is the foundation of dialing in. The 41 steps give you enough resolution at the fine end to move in small increments, which is how you actually dial a shot in.
Flaws but not dealbreakers: Step-based grinders give you fixed intervals, so a single step can jump you past the sweet spot on a fussy bean. You work around it by nudging dose slightly, and for a home station that is a fine trade for the price and the counter footprint.
Anyone building a first station, or upgrading from a blade grinder they should have thrown away a year ago, starts here.
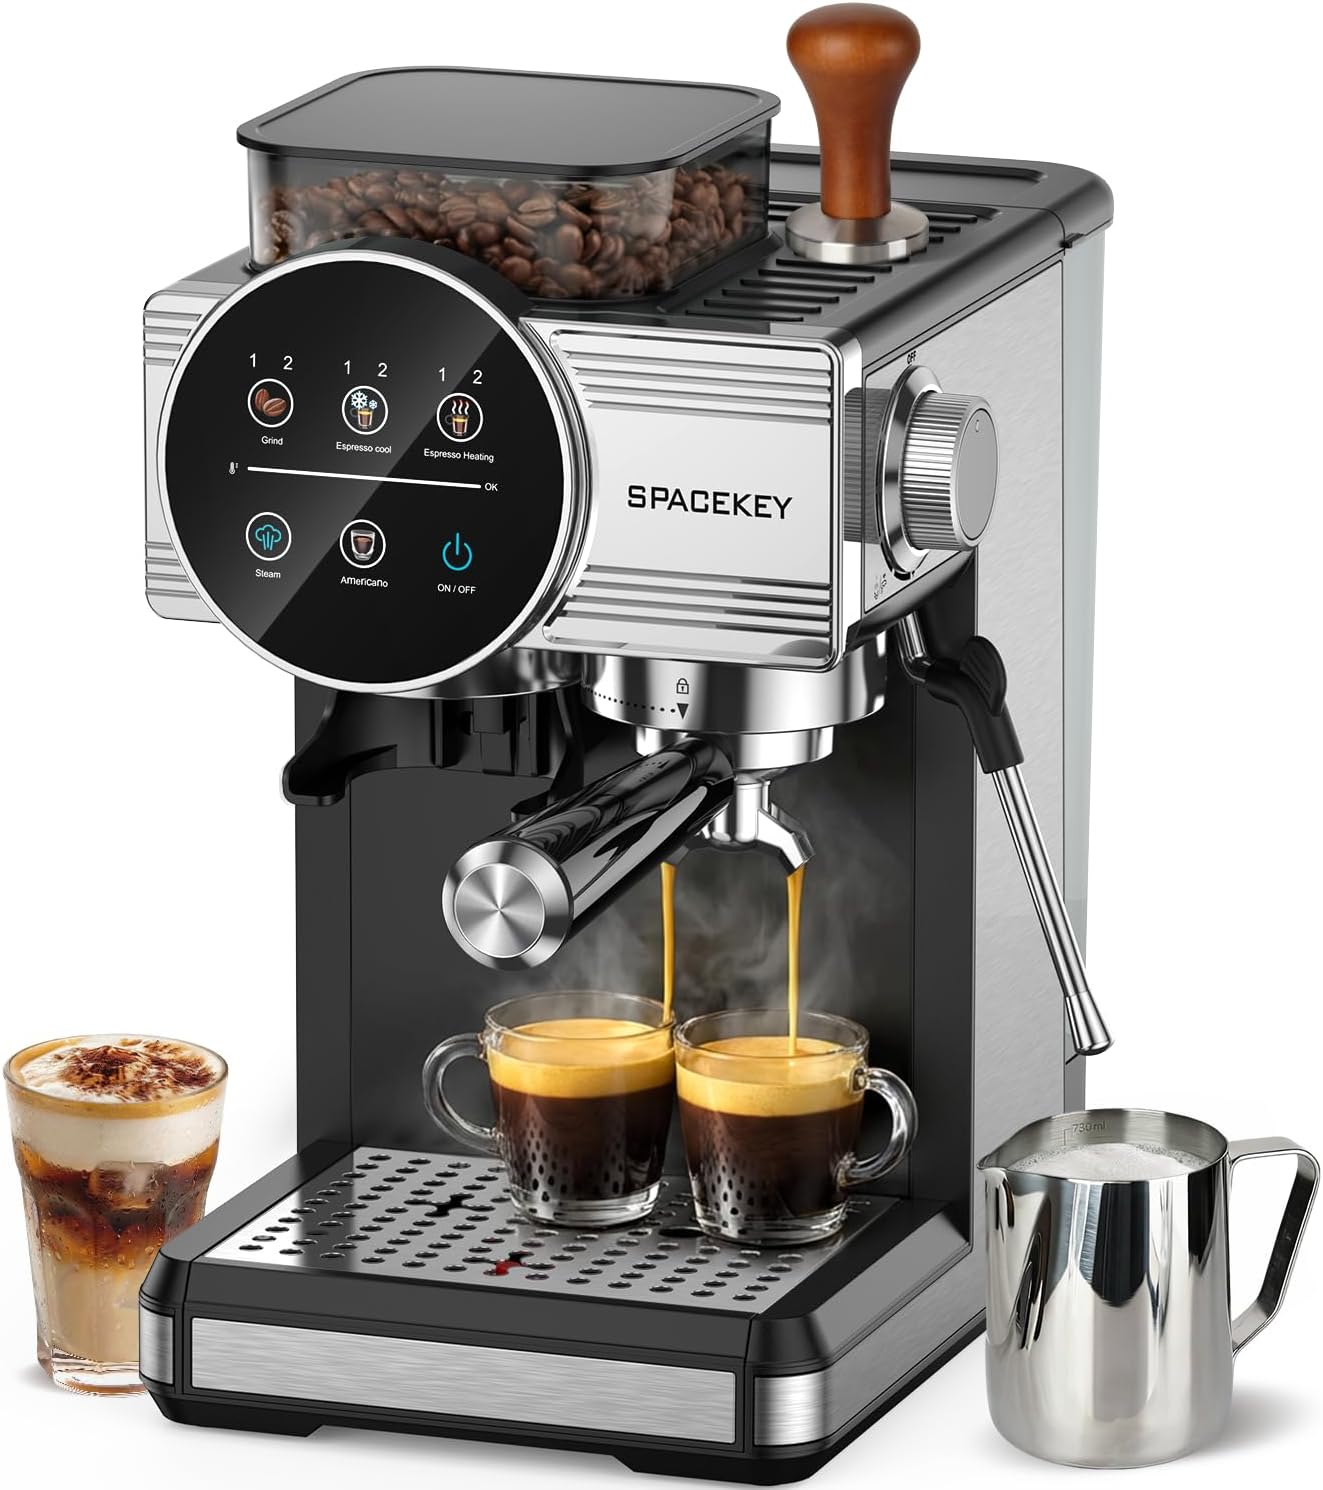
The all in one option: Espresso Machine with Grinder and Frother, 30 Grind Settings, 20 Bar
 Visit on Amazon →
This is the one-box answer. A 20 bar machine with a built-in grinder and a steam frother, 30 grind settings on the grinder, which means one purchase, one plug, one patch of counter. For a small kitchen, a dorm, or someone who wants to find out whether they even like this hobby before spending real money, that combination is hard to argue with.
Two things I would tell you before you order it. First, the built-in grinder is workable, not great. It will get you into espresso fineness and it will let you learn the workflow, but it is the part you will eventually outgrow, which is exactly why the Fellow Opus sits above this section. Second, the 20 bar number on the box is marketing language. Espresso is extracted around 9 bar, and most budget machines ship set higher than that. If you can adjust the over-pressure valve, do it. That single change transforms the shot on almost any machine in this class.
Flaws but not dealbreakers: Check which basket it arrives with. If the default is a pressurized basket, treat it as training wheels only. It hides stale beans and a bad grind, and it will keep you from learning what your grinder is telling you.
Anyone who wants a complete home espresso setup in a single purchase, with a frother for milk drinks on the same machine, will be happy here.
How to dial in a home espresso setup, step by step
This works on the pair above, and it works on a machine you already own. The order matters.
Step one: Settle the grinder before the machine. If you have not bought yet, buy the grinder first or at the same time. A machine can only extract what the grinder gives it, so the grinder sets your ceiling. Buying the machine first means you spend a month blaming the machine for a grind problem.
Step two: Break in new burrs. Fresh burrs cut inconsistently for their first several hundred grams. Run a bag of cheap beans through, dump them, and only then start chasing a good shot. Otherwise you will dial in a setting that stops working next week.
Step three: Start finer than you think. New espresso people always start too coarse, get a fast gushing shot, and then blame the machine. Start in the espresso range, expect the first shot to choke, and open up from there. It is easier to loosen a grind than to chase one that never had resistance.
Step four: Dose by weight, every time. A scoop is not a dose. Weigh the beans going in and the liquid coming out. Everything in dialing in depends on those two numbers being repeatable, and eyeballing them means you are changing variables without knowing it.
Step five: Distribute, then tamp level. Break up clumps with a stir or a distribution tool, settle the bed, then tamp flat with even pressure. Tilted tamps are the quiet cause of channeling, where water punches through one side of the puck and leaves the rest underextracted.
Step six: Pull against a target, not a feeling. The common starting convention is a 1:2 ratio in roughly 25 to 30 seconds, meaning twice the weight of espresso out as beans in. If it runs fast and tastes sour, grind finer. If it crawls and tastes bitter or dry, grind coarser. Taste decides, the clock just tells you which way to move.
Step seven: Change one variable at a time. Grind first, dose second, temperature last. People who adjust three things between shots learn nothing from either shot. If you want to understand your setup, move one dial and pull again.
Step eight: Pre-heat and respect the dead time. Give the machine long enough that the portafilter and group are hot to the touch before your first shot, or you will be fighting cold metal. On a single boiler machine, the wait between brewing and steaming is where the workflow dies, so pull your shots first and steam all the milk at the end.
Step nine: Treat water and cleaning as part of the recipe. Water chemistry makes or breaks a shot, and a machine that needs descaling every two weeks is a machine with a water problem. Use water you would be happy drinking, backflush on a regular schedule, and descale when the machine asks, not after it stops steaming.
Mistakes that wreck a home espresso setup
Pressurized baskets as a default. They are marketed as a feature and they are a crutch. They let you pull something drinkable from stale beans and a coarse grind, which means you never learn to taste the difference.
Stale beans. Espresso is a fresh product. If the roast date is not on the bag, assume it is old, and no machine on earth fixes that.
Spending the machine budget first. The most common mistake in this hobby, and the one that sends people back to the store.
Changing beans mid-dial-in. Every new bean is a new recipe. Finish one bag before you judge your settings.
Ignoring temperature stability. Pressure profiling is a feature you will use twice. Temperature stability is the feature you will feel every single shot.
The competition and why it lost
I recommend a lot of machines that are not in this guide. The Breville Barista Express is the best all-rounder for beginners, with a built-in grinder that is mediocre but workable and a gentle learning curve. The Gaggia Classic Pro is the budget modder's dream, and with a $40 OPV spring it punches far above its price, though the stock steam wand is weak. The Rancilio Silvia is the best first serious machine, bombproof with parts available forever, but the single boiler means you wait for steam. The ECM Synchronika is the endgame, dual boiler, rotary pump, temperature stability you could set your watch to. The De'Longhi Dedica is the tiny footprint pick for a counter with no room.
They lost here for one reason: this is a first station guide, not an upgrade guide. The two pieces above get a beginner pulling repeatable shots without a mod, a plumbing job, or a second mortgage. The others get their own article when you have outgrown this one.
What this all costs
I am not going to quote you a number, because prices move and yours will be whatever the listing says the day you buy. Check current Amazon price on both pieces and do your own math.
What I will tell you is how to split the budget. Put the larger share into the grinder and the smaller share into the machine, which is the opposite of what almost everyone does. Then leave a little room for the unglamorous stuff: a scale that reads to a tenth of a gram, a tamper that fits your basket, and good water. Those three things do more for shot quality than the next tier of machine.
If you are not ready to buy twice, the all in one machine is the honest starting point and the Fellow Opus is the upgrade you make when the built-in grinder becomes the bottleneck. That is the whole arc of this hobby, and it is a good one. Buy the grinder you can afford, learn the steps above until they are muscle memory, and the machine will take care of the rest.