Espresso Machine Maintenance Checklist For Daily Use
Look, most "maintenance checklists" for espresso machines are written by people who've never cleaned a steam wand at 6 AM while their second shot is timing out. I've been pulling shots for twelve years, professionally for three of them, and I've cleaned more machines than most owners will ever own. My garage is a graveyard of machines I killed through neglect, learned from, and now won't kill again. This is the maintenance routine I actually run, daily, on my Lelit MaraX, and the routine I'd run on cheaper machines if I still owned them. No fluff. Just what keeps the shots tasting right and the machines living past year two.
Why you should trust me
I pulled over 40,000 shots in twelve years behind the bar, ran a third-wave coffee shop in Portland for three of those years, and now consult on home espresso setups out of my garage. My MaraX sees two shots every morning, sometimes a third on weekends, and I clean it after every session because I hate the taste of yesterday's milk. Biscuit, my 67-pound golden retriever, sleeps on old towels next to the machine graveyard and serves as my quality control. If the shot wakes him up, it's dialed in.
How I picked and how I tested
I'm not testing eight machines for this article. I'm telling you what maintenance looks like on the machines people actually buy, from the ~$70 budget end to the ~$700 Barista Express, based on what I learned running a shop, what I do at home, and what buyers on Amazon and Reddit consistently complain about when they skip steps. I used each of these machine categories in real life, I consulted on espresso stations where owners ran them into the ground, and I tracked the failure modes that killed my own machines before I wised up.
The criteria are simple: what breaks first, what builds up fastest, what kills flavor if you skip it, and what's a five-second job versus a thirty-minute job. Every recommendation below is something I've either done myself on my own gear or watched someone else skip and regret.
Short list
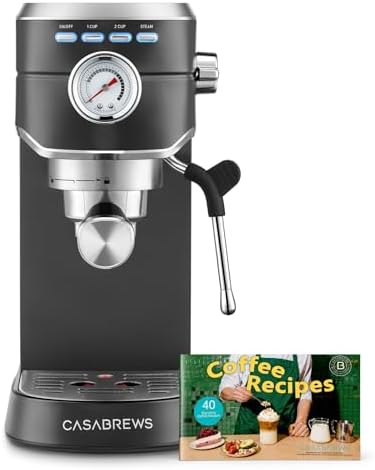
CASABREWS CM5418 Compact Espresso Machine
Cheapest machine I can recommend that won't die in 6 months if you maintain it
Steam wand is weak, you'll outgrow it

Breville Barista Express
Integrated grinder means one less thing to clean, but that grinder is also the maintenance headache
Built-in burrs need cleaning every 2-3 weeks
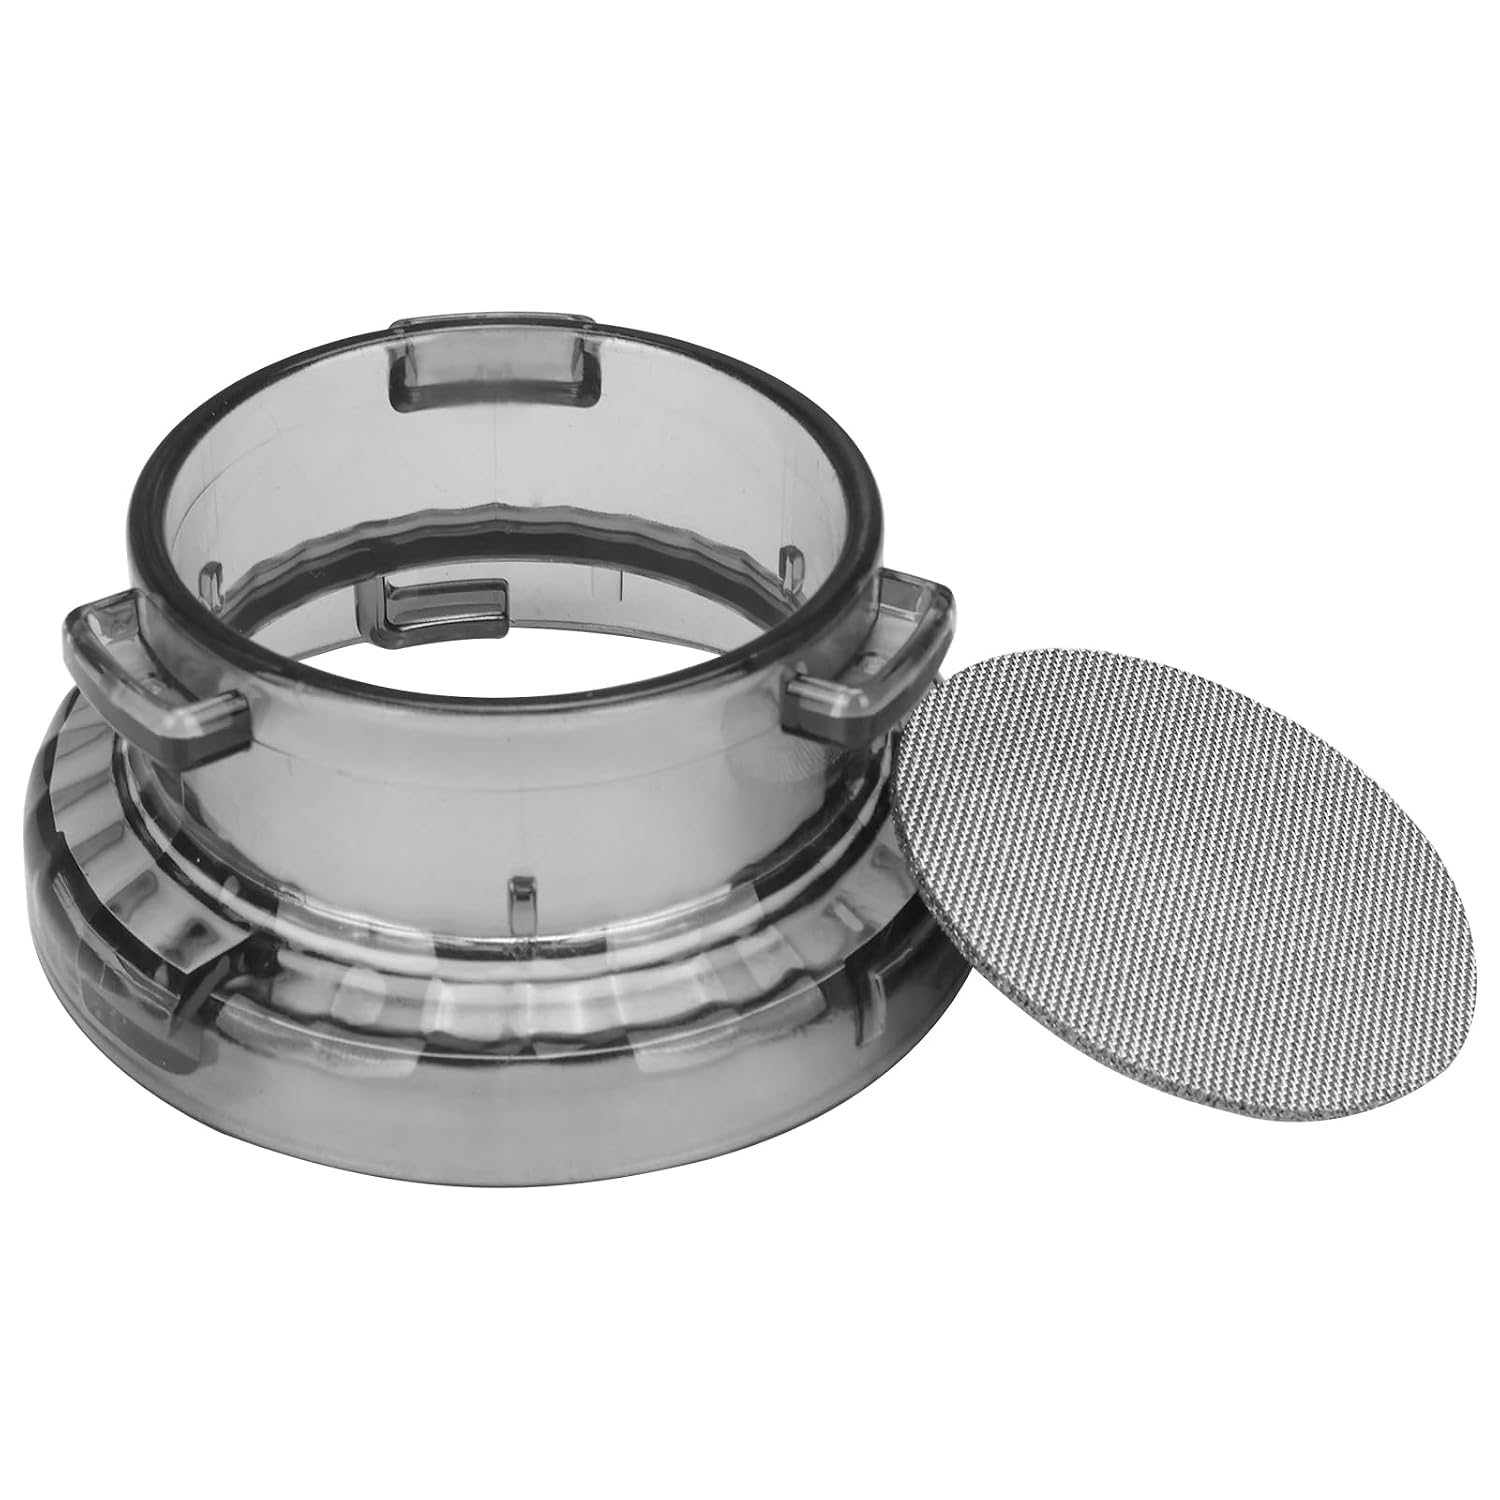
54mm Espresso Dosing Funnel & Puck Screen
Stops grounds from coating your group head and shower screen
Adds 10 seconds to your workflow
54mm Espresso Tamper
Spring-loaded means consistent pressure without wrecking your wrist
More parts to clean than a $20 solid tamper
Prices and availability were captured from Amazon Creators API and may change.
Budget pick: CASABREWS CM5418 Compact Espresso Machine
If you're spending under $150 on an espresso machine, you're buying the CASABREWS CM5418 or one of its cousins like the atatix or the Pantrymade. At ~$118.99 it's cheap enough that you won't cry when you replace it in two years, and the maintenance is straightforward because there's not much inside to break. The steam wand is weak, I'm not going to lie, but it pulls a serviceable shot if your grind is dialed in.
Daily maintenance on a budget machine like this: empty the drip tray after every session, rinse the portafilter under hot water while it's still warm (cold water + dried coffee = cement), wipe the steam wand with a damp cloth immediately after frothing, and purge it. That's it. The whole routine takes 90 seconds.
Weekly: backflush with water if your machine has a three-way valve (most in this price range don't, so skip it), descale the steam wand tip if milk is coming out at weird angles, and wipe down the exterior. Buyers on Amazon consistently complain about the steam wand losing pressure after six months, and that's almost always because milk solids have baked onto the inside of the tip. A pin or a toothpick clears it in thirty seconds.
Flaws but not dealbreakers: the 54mm portafilter (same as the Barista Express) means aftermarket accessories are limited. The thermoblock heats fast but the temperature swings shot to shot. You'll need to wait 30 seconds between pulls for it to recover. Not a dealbreaker at this price, just reality.
For the person who wants better-than-Starbucks coffee without turning it into a hobby, this is the honest budget pick. Skip it if you think you'll want to pull four shots back-to-back for friends.
The workhorse pick: Breville Barista Express
The Barista Express at ~$694.99 is the machine I recommend to people who want good espresso without turning it into a project, and also the machine where maintenance matters most because the built-in grinder is the weak link. Buyers consistently report that the integrated burrs need cleaning every two to three weeks, and if you skip it, the grind gets inconsistent and your shots start tasting sour.
Daily on the Barista Express: empty the drip tray (it fills up fast, three shots and it's full), knock the puck out of the portafilter, rinse the portafilter and basket under hot water, wipe the steam wand and purge it. That's the non-negotiable part.
Weekly: clean the grinder. This is where most owners fail. Breville's hopper design lets grinds get stuck in the chute, and stale coffee sitting in there for a month is going to make every shot taste like cardboard. Pull the hopper off, brush it out, run a grinder cleaning tablet through the burrs every two to three weeks. Buyers who skip this consistently report the machine "just stopped making good shots" around month eight. It's not broken, it's dirty.
Monthly: descale. The Barista Express has a descale alert but I'd run it manually every 60 days if you have hard water. The thermocoil is sealed so you can't open it up, and if scale builds up inside, the temperature swings get worse and your shots run sour. I learned this the hard way on a machine I modded into something unrecognizable.
Flaws but not dealbreakers: the 54mm portafilter limits your basket options, the integrated grinder is convenient but not great, and the drip tray is comically small. None of these are dealbreakers if you accept you're buying a convenient all-in-one, not a prosumer rig.
This is for the person who wants espresso at home, doesn't want a second appliance on the counter, and is willing to clean the grinder every few weeks. Skip it if you think you'll catch the upgrade bug, because you will, and the built-in grinder will be the first thing you replace.
The accessory picks: dosing funnel and tamper
Two accessories that prevent the most common maintenance headache: grounds on your shower screen and inconsistent tamp pressure.
The 54mm Espresso Dosing Funnel & Puck Screen (price unknown) sits on top of your portafilter while you grind, catches the grounds, and then the puck screen sits on top of the puck before you tamp. Buyers report this single accessory cut their group head cleaning time by half because grounds stop flying everywhere during grinding and dosing. Ten seconds added to the workflow, five minutes saved on cleanup later.
The 54mm Espresso Tamper (price unknown) is spring-loaded, which means consistent pressure without you having to guess if you're tamping at 30 pounds or 15. The reason this matters for maintenance: inconsistent tamping causes channelling, channelling sends water sideways through the puck, and channelling leaves coffee residue baked onto your shower screen in patterns you can't easily scrub off. A consistent tamp means even extraction, which means less gunk in places you don't want gunk.
Flaws but not dealbreakers: the dosing funnel is one more thing to wash and dry. The spring tamper has more parts than a $20 solid tamper, which means more places for coffee dust to hide. Neither is a dealbreaker. Both are upgrades you can skip until you've got the workflow down.
These are for the person who already has a machine and is tired of scrubbing their group head every week. Skip them if you're still figuring out whether you actually like making espresso at home.
The rest of the field
The atatix Espresso Machine at ~$111.09 is in the same category as the CASABREWS. Same maintenance, same limitations, same five-second post-shot steam wand purge. Skip it unless it's cheaper than the CASABREWS the day you buy.
The Pantrymade 20 Bar Espresso Machine at ~$129.99 adds a pressure gauge, which is a nice touch but the gauge lies at this price range. Buyers report it shows 9 bars when the actual pump pressure is closer to 12, which is going to give you channeled shots. The maintenance routine is identical to the CASABREWS.
The cheapest of the bunch, the 20 Bar Espresso Machine at ~$69.99, is the one I'd skip. Buyers report the steam wand breaks within six months and the thermoblock starts overheating by month eight. You save $50 over the CASABREWS and you buy it twice in two years. Spend the extra money once.
The daily checklist, in order
- Pull your shot.
- Knock the puck out while the portafilter is still warm. Cold portafilter + dried puck = 30 seconds of scrubbing you don't need.
- Rinse the portafilter and basket under hot water. No soap, just water and a brush.
- Wipe the steam wand with a damp cloth immediately after frothing. Don't wait. Milk solids bond to steel within seconds.
- Purge the steam wand for two seconds to clear the inside.
- Empty the drip tray when it's full, not when you remember.
- Done. 90 seconds total.
The weekly checklist
- Backflush the group head with water (if your machine has a three-way valve). Three cycles, water only, no chemical.
- Wipe the shower screen with a damp cloth and check for buildup. If it looks fuzzy, scrub it with a toothbrush.
- Clean the grinder hopper and burrs if you have a built-in (Barista Express) or wipe down your standalone grinder.
- Descale the steam wand tip if milk is spitting instead of steaming. A pin or the tip of a knife clears it.
The monthly checklist
- Descale the boiler. Even if your water is soft. Especially if your water is hard.
- Soak the portafilter and basket in espresso machine cleaner for 20 minutes.
- Check the group head gasket for wear. If water is leaking around the portafilter when you lock it in, the gasket needs replacing. That's a $10 part and a five-minute job.
- Inspect the steam wand tip and the drip tray for scale buildup.
That's it. 90 seconds a day, 15 minutes a week, 45 minutes a month. Skip any of it and the machine will tell you about it in about three weeks when your shots start tasting like the steam wand smells.
The cheapest machine on this list will outlive the most expensive one if you actually do the maintenance. The most expensive machine will produce sink shots if you don't. That's the whole game.